DIY Charcuterie: Creating a Stunning Cheese Platter at Home


Introduction to DIY Charcuterie
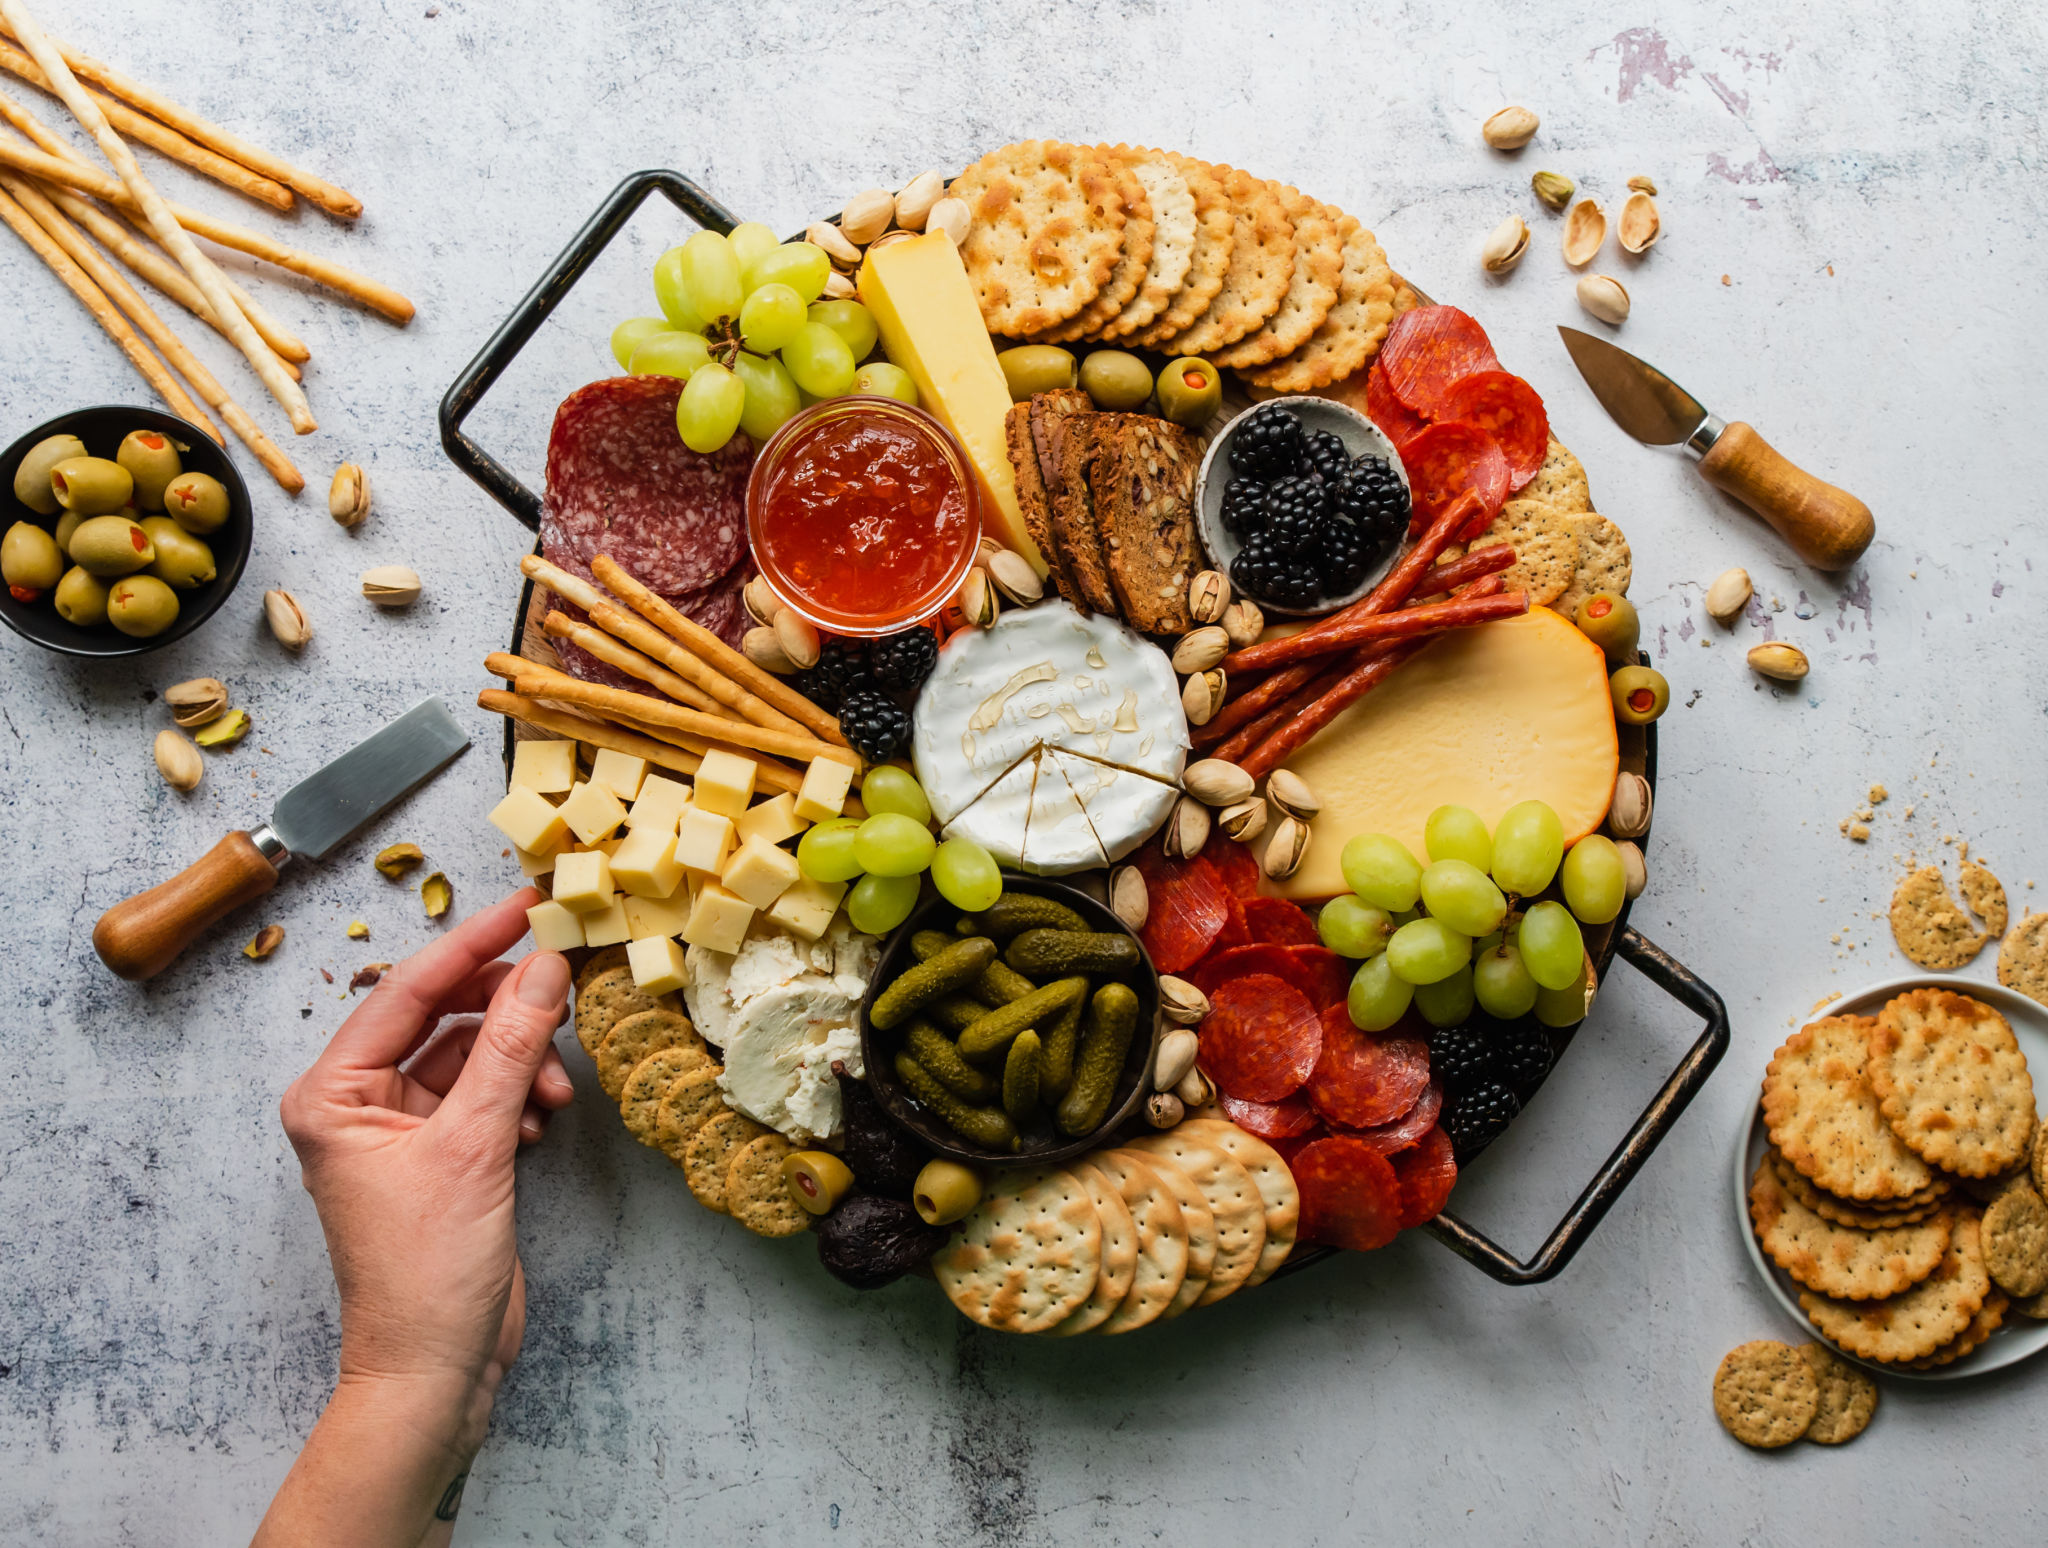
Creating a charcuterie board at home is an art that combines culinary skills with a touch of creativity. Whether you're hosting a party or simply indulging in a solo treat, crafting your own cheese platter can be a rewarding experience. With the right ingredients and a few simple tips, you can create a stunning display that will impress your guests and tantalize their taste buds.
Charcuterie boards have become popular for their versatility and visual appeal. They allow you to showcase a variety of flavors and textures, making them perfect for any occasion. Plus, they require minimal cooking, which means you can spend more time enjoying the company of your guests.
Selecting the Right Ingredients
To create a memorable charcuterie board, it's important to choose a variety of ingredients that complement each other. Start with the cheeses, which are the centerpiece of your platter. Aim for a mix of textures and flavors by including soft, semi-soft, and hard cheeses. Popular choices include brie, gouda, cheddar, and blue cheese.
Adding Meats and Accoutrements
Next, add an assortment of cured meats. Prosciutto, salami, and chorizo are excellent options that pair beautifully with cheese. After selecting your meats, consider adding accompaniments like nuts, dried fruits, olives, and fresh fruits such as grapes or sliced apples. These elements add color and contrast to your board.

Arranging Your Platter
The arrangement of your charcuterie board is just as important as the ingredients themselves. Begin by placing the cheeses on the board, spacing them evenly. Next, add the meats around the cheeses, folding them into interesting shapes for visual appeal. Fill in the gaps with your chosen accompaniments.
Creating Visual Appeal
For an eye-catching display, consider using a wooden board or slate as your base. This not only provides a rustic charm but also contrasts nicely with the vibrant colors of the food. Use small bowls for items like olives or nuts to keep your board tidy and organized.

Tips for a Stunning Presentation
To make your cheese platter truly stand out, consider adding some fresh herbs or edible flowers for a pop of color. Additionally, label each cheese and meat with small tags so guests know what they're enjoying. This adds an educational element to your spread and encourages conversation.
Timing is also crucial when serving your charcuterie board. Allow the cheeses to come to room temperature before serving to enhance their flavors. This usually takes about 30 minutes after removing them from the fridge.
Conclusion: Enjoying Your Creation
Once your charcuterie board is complete, take a moment to admire your handiwork before indulging. Whether you're sharing it with friends or savoring it alone, a well-crafted cheese platter is sure to delight. Remember, the beauty of DIY charcuterie lies in its flexibility, so don't be afraid to experiment with different ingredients and arrangements. With practice, you'll master the art of creating stunning cheese platters that are as pleasing to the eye as they are to the palate.